Mikrotik + FreeRADIUS on UCS
Having multiple systems where you manage authentication can be a pain. You need to take care of all the different logins, create users on multiple systems, back up multiple systems, this can become complicated real quick.

There are multiple ways of solving this but I will focus on UCS - Univention Corporate server in how to accomplish this. I also won't go into to much detail regarding UCS, if you are not familiar with UCS or want to know more about UCS I suggest you start reading the UCS documentation or even install a server to play with.
FreeRADIUS Setup
The first thing I wanted to tackle with UCS is the usage of a Radius server. Installing a FreeRadius on UCS is as simple as a single click, that's it but the hard part comes after that if you want to integrate with other systems and even want to use custom fields.
Here's how I integrated our Mikrotik users with FreeRadius from UCS.
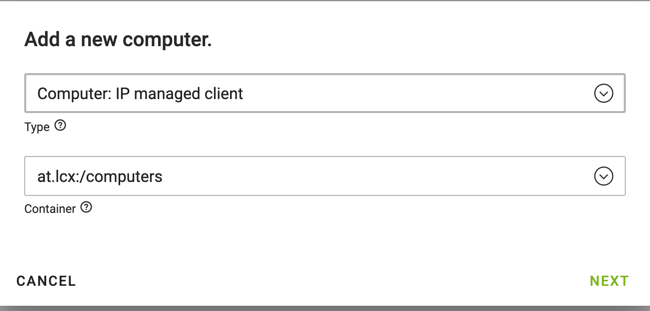
The first thing you have to do is to install Freeradius from the UCS App Center. Once you have done that, go ahead and create a new "IP Managed client" under devices -> computers.
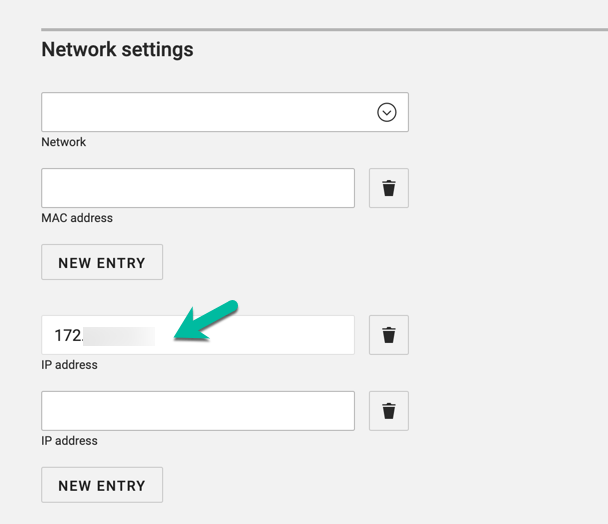
Set the IP address of Mikrotik in the device configuration otherwise, Freeradius will reject the connection from this device.
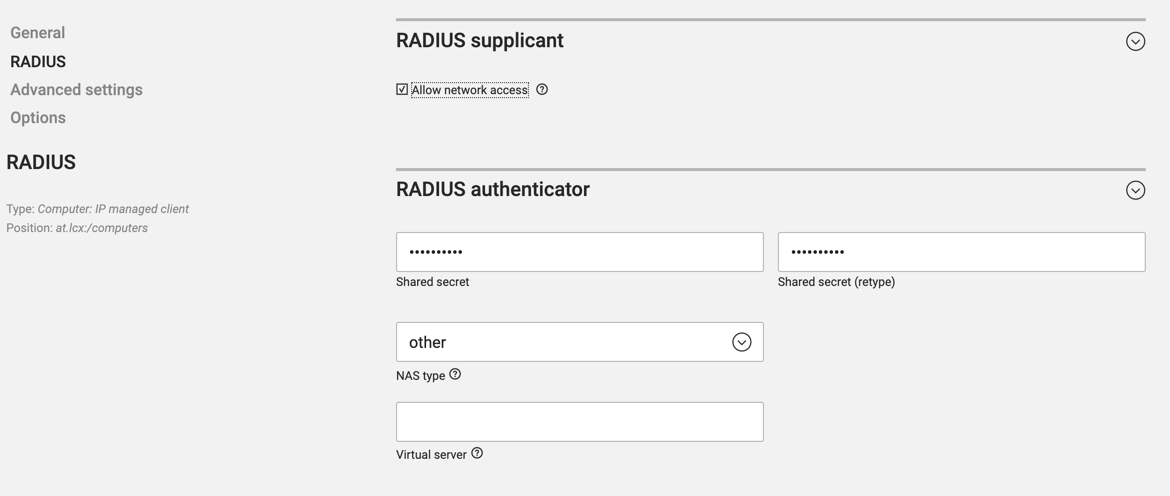
Now under the RADIUS tab for the device enable "Allow network access" and define a shared secret under "RADIUS authenticator" set NAS type to "other" we don't really need this.
Enable RADIUS on Mikrotik
Now log in to the Mikrotik and enable radius
/radius add address=<UCS IP> secret=<SHARED SECRET> service=login authentication-port=1812 accounting-port=1813 protocol=udp
Set the UCS IP to the IP Address of the UCS server and enter the shared secret you just defined under the RADIUS tab in UCS.
Our Mikrotik is connected via VPN to the Network where UCS is connected so I didn't spend any time in SSL or certificates.
Now enable /user aaa on the Mikrotik it should look like this:
      use-radius: yes
      accounting: yes
  interim-update: 0s
   default-group: read
  exclude-groups:
Leave the default-group setting to read.
User setup in UCS
Now back to UCS, create a new user or update an existing user in UCS.
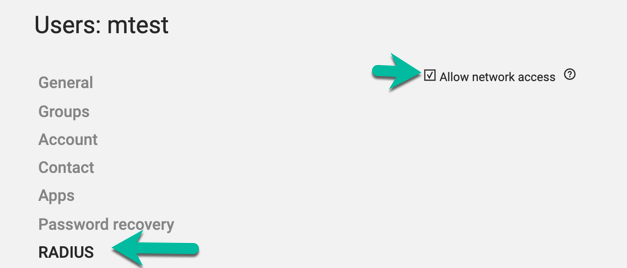
Click on radius and enable "Allow network access"
If you now try to log in with this user on the Mikrotik, you should be successful, if not it's time to check the logs.
First look at /var/log/freeradius/radius.log if you see something that shows why it's not working.
The next file you should check is /var/log/univention/radius_ntlm_auth.log this file might not exist, to create some debug output you need to change the log level of freeRADIUS.
On the UCS CLI set the log level to 4: ucr set freeradius/auth/helper/ntlm/debug=4 commit the setting to the config files ucr commit /etc/freeradius/3.0/* and restart freeRADIUS service freeradius restart.
Now try to log in again and you should see debug output in the file /var/log/univention/radius_ntlm_auth.log.
If you can't log in, you also see no radius traffic and /radius monitor 0 on mikrotik is showing no activity, it might be that the local user (if you had one and removed it) still has a SSH Key. If this is the case the RADIUS authentication won't work and you need to remove the SSH Key!
Per-user permissions on the Mikrotik
Hurray, a successful login on the Mikrotik via Radius, but there's a problem. Remember the default-group: read in the Mikrotik /user aaa setting? Well, this means that every RADIUS user has read-only permission. You could set this to whatever group you want instead of read but I don't like this approach and I prefer it to be able to define permissions for each user. Using a simple FreeRADIUS configuration based on file this would be as simple as adding MikroTik-Group := "write" to the user but wouldn't it be nice to have a possibility to configure this from UCS?
Add a new LDAP attribute
For this to work, you need a new LDAP attribute where you can save the user group after the user signed in via RADIUS.
Go to Domain -> LDAP Directory and under univention -> custom attributes, add a new attribute.
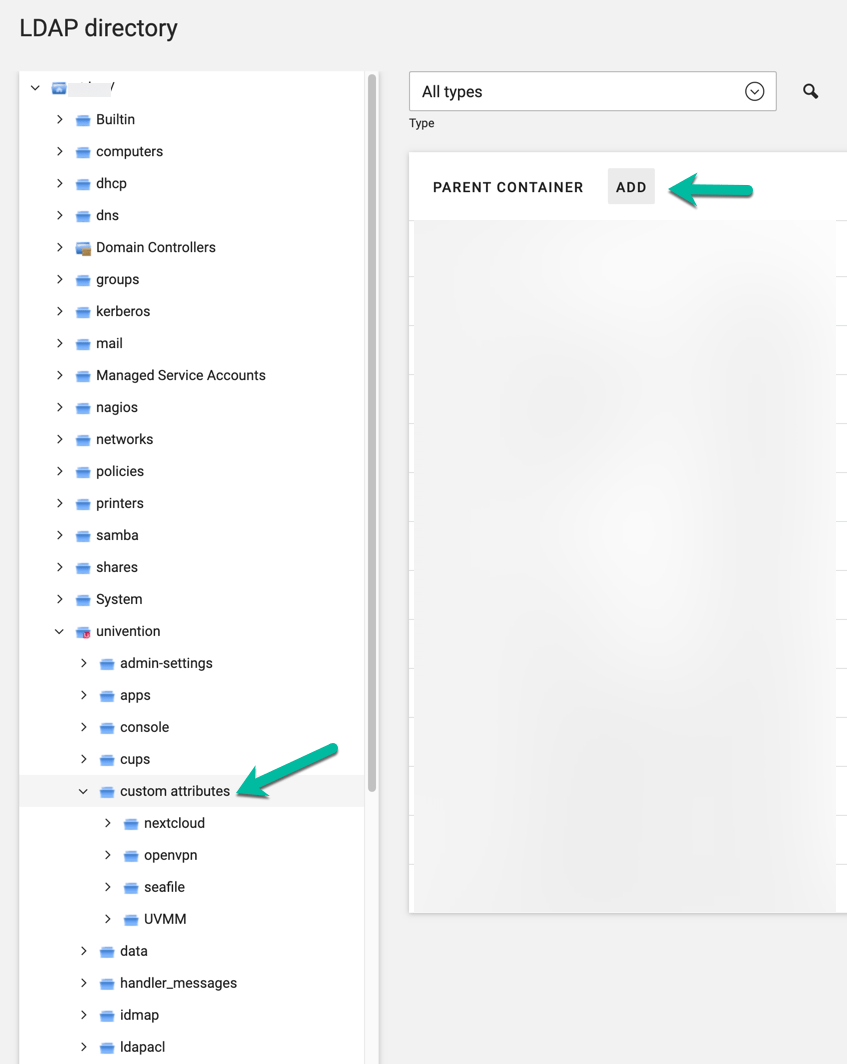
Make it a "Settings: Extended attribute"
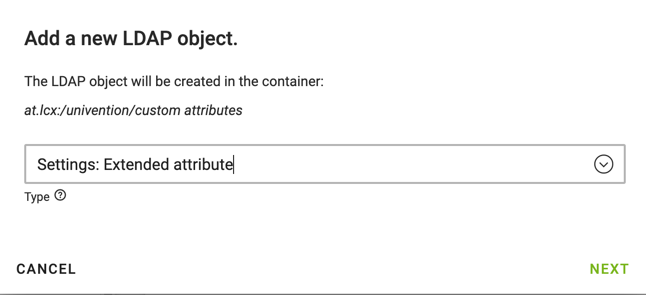
Enter a object name, description and translations as needed but make sure to not have spaces in the object name like in this screenshot, this will be rejected once saving.
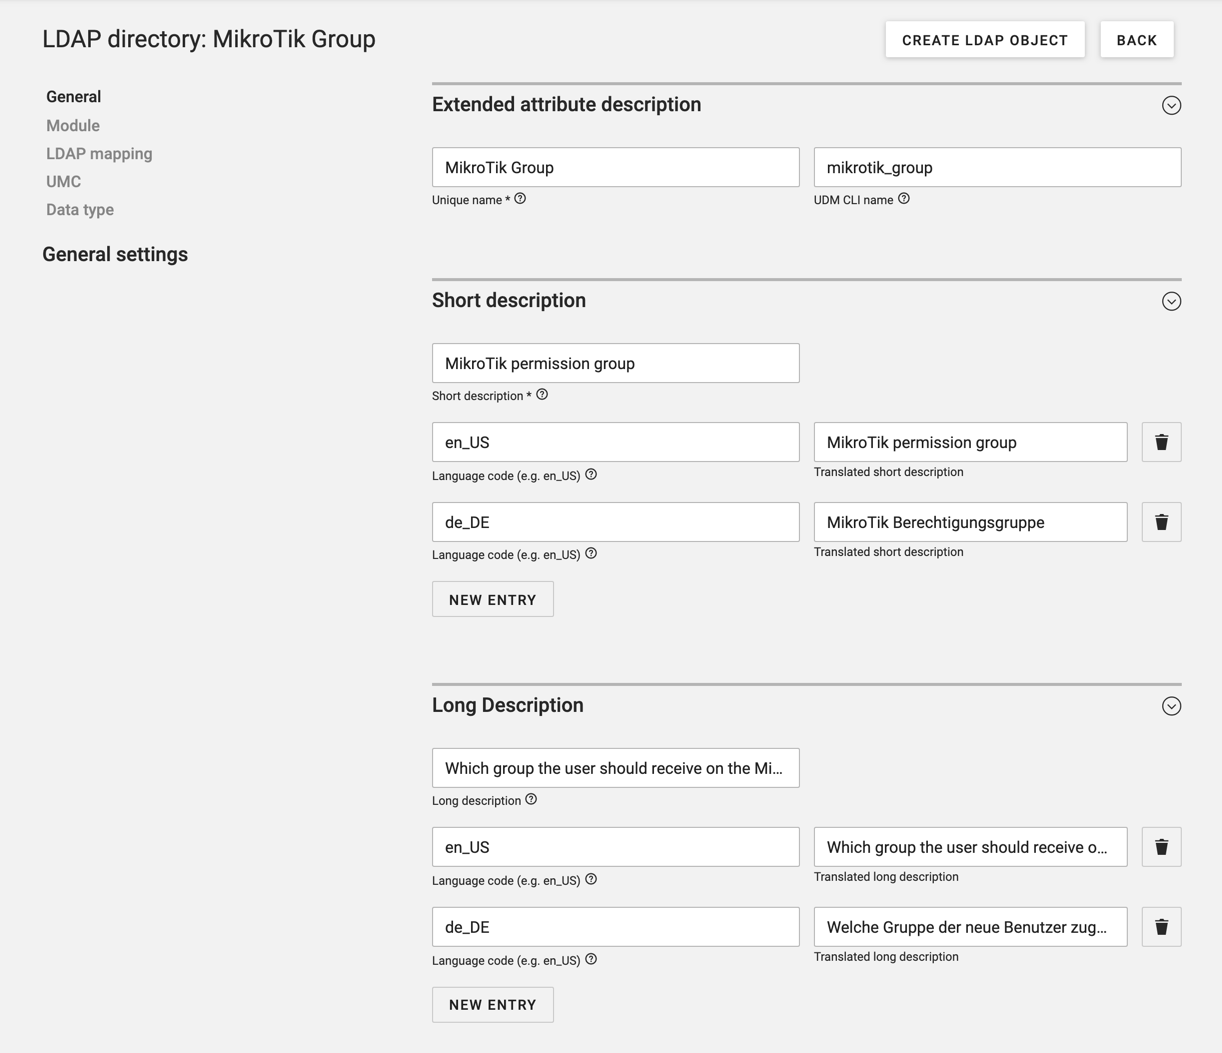
Now select the "User" module as the module to be extended
Under LDAP mapping set the LDAP object class to univentionFreeAttributes and the LDAP attribute to univentionFreeAttribute1

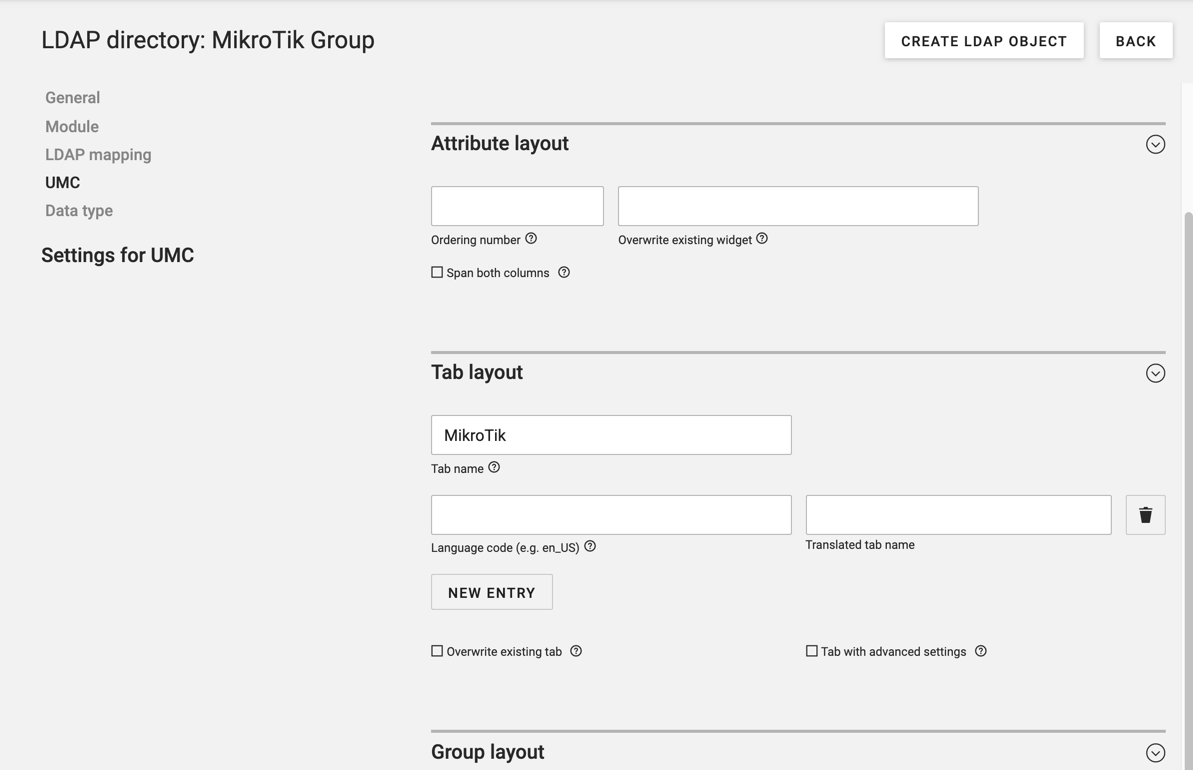
Create a new Mikrotik tab under "UMC"
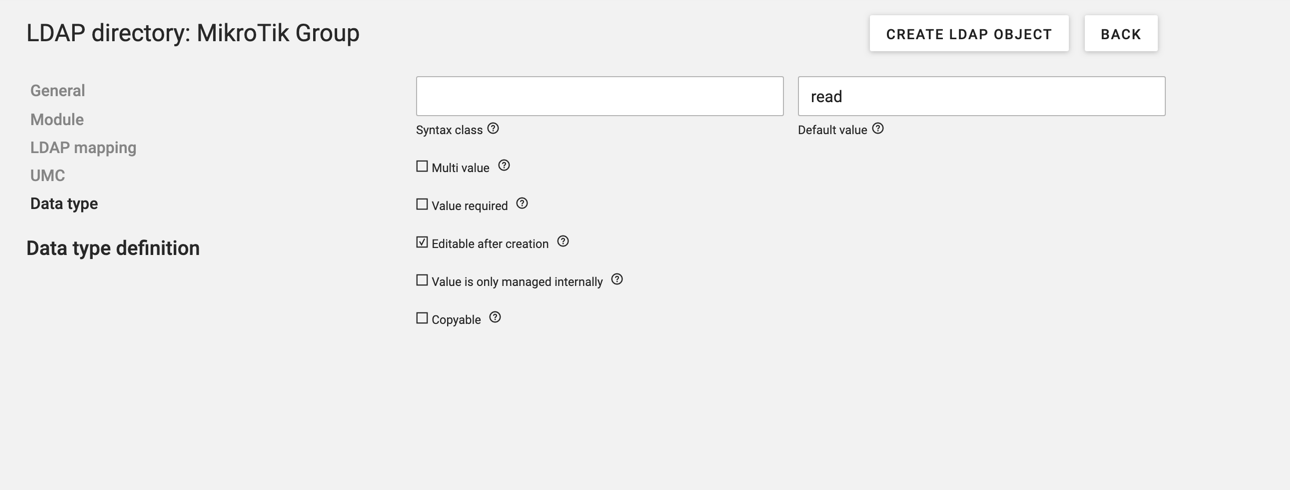
Set the default value and that it should be editable after creation.
Now you can create the new ldap object.
Updating RADIUS to see LDAP Parameter
The last thing you need to do is to send this newly defined parameter via RADIUS to the Mikrotik.
Edit the RADIUS LDAP configuration template /etc/univention/templates/files/etc/freeradius/3.0/mods-available/ldap and around line 124 (on UCS 4.4) you will find something like this:
       update {
                control:Password-With-Header    += 'userPassword'
#               control:NT-Password             := 'ntPassword'
#               reply:Reply-Message             := 'radiusReplyMessage'
#               reply:Tunnel-Type               := 'radiusTunnelType'
#               reply:Tunnel-Medium-Type        := 'radiusTunnelMediumType'
#               reply:Tunnel-Private-Group-ID   := 'radiusTunnelPrivategroupId'

                #  Where only a list is specified as the RADIUS attribute,
                #  the value of the LDAP attribute is parsed as a valuepair
                #  in the same format as the 'valuepair_attribute' (above).
                control:                        += 'radiusControlAttribute'
                request:                        += 'radiusRequestAttribute'
                reply:                          += 'radiusReplyAttribute'
Add a line under control:Password-With-Header += 'userPassword' to pass the parameter univentionFreeAttribute1 as MikroTik-Group to the Mikrotik.
update {
  control:Password-With-Header    += 'userPassword'
  reply:MikroTik-Group            := 'univentionFreeAttribute1'
  ....
Commit the changes ucr commit /etc/freeradius/3.0/mods-available/ldap and restart freeRADIUS service freeradius restart
Now if you edit the user in UCS, you will see a new tab "Mikrotik", click on it and update the group to whatever group you would like your user to be, in my case full for this admin user.
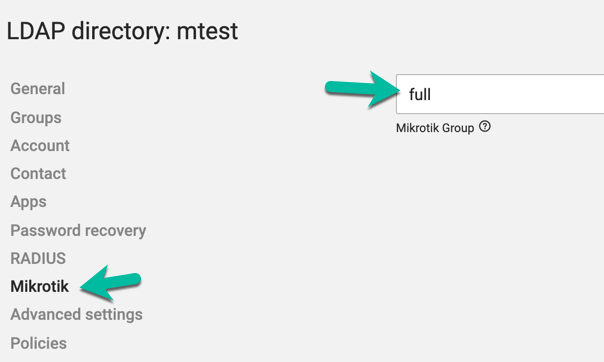
If you now log in to the Mikrotik again, you have full permissions (or whatever permissions you gave that user).
Yessss!
Restricting Mikrotik users even more
Maybe the default read permissions is still too much as default since the read user could reboot the router. Let's create a new group with even less permissions.
/user group add name="radius"
/user group set numbers="radius" policy=ssh,web,winbox,test
/user aaa set default-group=radius
Creating new routers via CLI
If you don't want to click around to create new computer entries or want to automate it, you can do it via command line as well.
eval $(ucr shell)
udm computers/ipmanagedclient create --position "cn=computers,$ldap_base" --option radiusAuthenticator --set ip=10.0.0.1 --set mac=dd:26:8a:17:2a:64 --set name="mt-foobar" --set networkAccess=1 --set univentionRadiusClientSharedSecret=<verysecretpass> --set univentionRadiusClientType=other
change the name, ip, mac and the shared secret accordingly and you are done.
That's it you can now authenticate your mikrotik users against your UCS users with RADIUS.
